Simple Photography Tips - how to get your exposure right for Sunset photographs
- Michael Blyth

- Jul 11, 2025
- 3 min read
Seven Simple Photography Tips for Late Evening Shooting
(Applies to both Cameras and Phone Cameras)
Tap to Set the Exposure Area. Light levels drop quickly in the evening. Choosing the right area to expose from (by tapping on your phone screen or metering with your camera) can completely shift the look and feel of your shot.
Small Adjustments Make a Big Difference Even the slightest shift in your exposure point can dramatically change the lighting balance. Experiment by tapping or metering from nearby highlights or shadows.
Move the Camera Until the Light Works Light direction is everything. Tilt, shift, or walk a few steps
Check Your Shutter Speed (Camera Users) As it gets darker, slower shutter speeds risk camera shake. Keep an eye on it—use a wider aperture or higher ISO if needed, or brace yourself against something solid.
Explore Composition Option The soft, fading light of evening is perfect for creative framing. Look for silhouettes, symmetry, and reflections—and don’t forget the sky.
Use What's in the Way If something’s blocking part of your scene, try including it deliberately. Foreground shapes or shadows can add depth, mystery, or atmosphere.
Wait a Few Minutes The light can change dramatically in a short time. Be patient—just five minutes can turn a flat scene into something magical.
So this is a rather rushed put-together for this post as I'm helping set up a charity event in our village for tomorrow. But it will help some of you I'm sure.
Just outside Rotterdam is a bump, a bit like the swelling from a mosquito bite - and there are plenty of those there. Some might call it a hill, a mole might call it a mountain. And it has a ski slope on it! It is named Hoge Bergse Bos, or thereabouts, and like much of the Netherlands, there is water involved.
A late evening preamble by the lake to the side of this wart, is an enjoyable experience, and we partook.
Aware of the difficulty with exposure in these conditions, where the eye/brain is so clever, but a camera is not, I took a short series of photos to help you sort your images, and to inspire you to experiment.

Image One was the point and shoot result, and the result is very much dependant upon where the main metering is taking place - in this case, dead centre.
One Simple Photography Tip, just in case you don't already know, is to tap the screen on your phone and it should then expose based upon that area.

Image Two was a case of tapping on the dark patch of grass in the foreground, which has led the computer onboard to try to make that meet the settings it has inbuilt. But the result is too light overall, and a burnt out sky.

Image Three was as a result of tapping different parts of the screen until the balance seemed better. Its a case of experimentation.
If you're using a camera, the exposure systems are usually better, depending on the age of the beast, but it's again a case of defining your point of meter-reading, and adjusting accordingly. Perhaps using a centre-weighted exposure setting. - Contact me if you don't understand that.

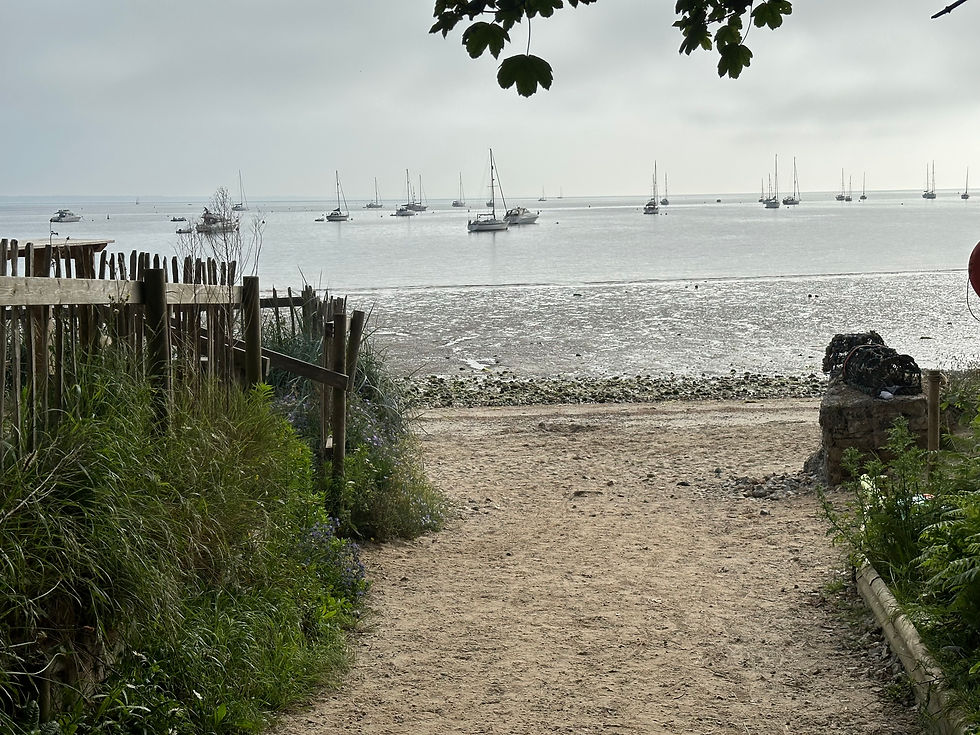
Image Four is not so much about the exposure, but a sidestep about composition.
In the preceding images the path runs at an angle which meets the line of the lakeside opposite, almost on a horizontal third, and both visibly slope, leading the eye to the left.
This image is taken with the path and near lakeside neary horizontal. The far-side of the lake is almost parallel to it, as is the horizon, also the line of clouds.
In the first three images the hils to the left and right provide the balance, in the last image it is the willow tree to the left and the tree to the right that perform that role.
Neither is right, nor wrong, just different, and engenders different responses in your brain.


Comments