Simple Photography Tips - Sunset Photography
- Michael Blyth

- Dec 17, 2025
- 4 min read
Five simple photography tips for sunset photography
Don't just photograph the sun setting, have a scene. The photograph gets interesting when the light is 'painting' clouds, water, rock, reeds, or haze
Texture in the sky gives you shape, drama, and those moments where the whole scene glows. Enjoy clouds in the scene
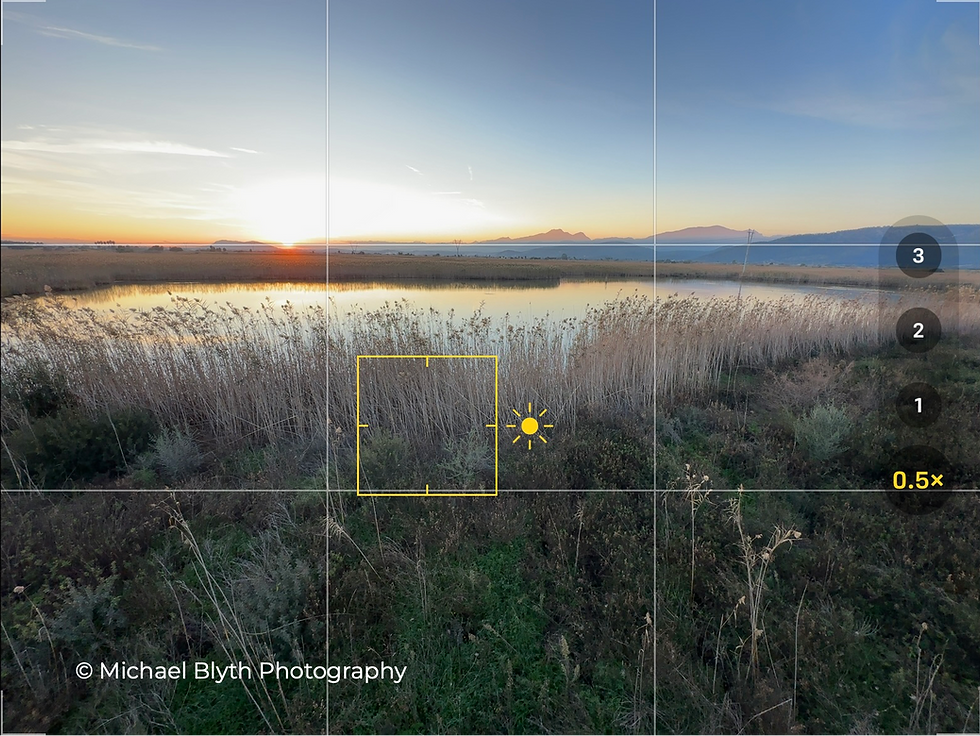
A phone will usually try to make the scene “even”, which can mean: bright sky blown out, or dark foreground lifted into murky mush
Power lines, masts, random bright patches, they’ll quietly wreck a print even if they don’t ruin a quick phone view.
Afterglow can be softer, richer, and easier to expose, and it’s when silhouettes and reflections start behaving.
The words for this sunset photography blog were first penned in 2024 on a trip to a Greek island, just before I dropped my i-phone over a wall and lost the images that were to go with it!
This time I've just returned from a trip to Mallorca, albeit on crutches, having damaged my knee when up walking and photographing on the Puig des Romani near Alcúdia.
Perhaps rather blunt, but sunrise and sunset photography centre around the appearance or disappearance of an immensely bright splodge of light, either appearing over the horizon or sinking below the horizon.
There's nothing unusual about this, happens every day, has been for a few years now, and God-willing, will continue to.
Photographically it's pretty boring, and it needs a number of add-ons to give it interest, certainly if you want to print it for others to enjoy.
There is of course the locational or emotional tag you can add - 'Dawn from the Top of Everest', 'Sunset at Lands End', 'Sunrise at Ayers Rock' but this doesn't change the image itself.
Added to this is the problem of relative size. Unless you have an extremely long lens attached to a camera rather than a phone, you are going to struggle to get something worth keeping.
That light that during the day can be incredibly bright, and at either end of the day can seem to your focused eye even larger, is really still rather small and much less bright. So it has far less visual “weight” in the photograph.
So how do we improve this?
By being aware beforehand of what the surroundings are, and any additional colours and features that add interest - or spoil it.
Then there is the whole matter of exposure.
Here are a few sunset images that we can look at together and 'assess'!


One thing to burn into your brain is, that if there are clouds around, you stand a chance of catching a fantastic sunset, way better than just the shiny orb disappearing over the edge of the earth.
Sometimes with what are known as crepuscular rays.
For your interest, I quote from the UK Met Office: Crepuscular rays are usually red or yellow in appearance because the path through the atmosphere at sunrise and sunset passes through up to 40 times as much air as rays from a high midday sun. Particles in the air scatter short wavelength light (blue and green) through Rayleigh scattering much more strongly than longer wavelength yellow and red light.

Image Six is a real case of not assuming. We were heading for the very southern tip of Mallorca to watch the sun go down, but for most of the journey were commenting that it looked too cloudy for a sunset - but how wrong we were!
Even when I was a geologist in Zimbabwe - a few decades ago - there were pretty good sunsets, but none compared with this!
The lit up sky was almost surrounding us, much more than this image suggests.
The reason it doesn't show up as much is that at this point I'd selected the 24 mm lens on my i-phone and dropped down quite low to put the medium sized rock as a foreground.
So what can I share by way of take-homes?
Well one thing I've not mentioned is the distractions in the first images - there are, if you look carefully, a line of transmission lines going from right to left - horrible ugly distractions - but they do in fact lead the eye towerds the sun.
There is a difference between a scene at sunset, and a sunset with some scenery as a balance. The images I've shown probably err in the direction of the former, and it's something to bear in mind when you balance your photo.
The contrast in a scene is critical, the last image has the most balanced illumination, the ones in the national park, have high variation, thus the metering advice.
And then of course there is the other option - the after-light as an illuminator.

Image Seven, was for me a most exciting moment, they were only the second lot of Flamingoes I've seen and were a real challenge to photograph, and it took a lot of waiting for them to form up as they are here, and to all stand upright.
The picture only works as there was sufficient lit water behind to avoid their heads being hidden. Interestingly, and a first for me, I instructed ChatGPT to improve this image as it was taken at the extreme ability of my phone camera. The improvement was minimal.
Reminds me of photographing the Queen, at an event where there was a dais within the gazebo she and her entourage were sitting in..
When the entourage stood for the National Anthem, they were all headless!!


Comments